Saturday, November 23, 2013

Olympus OM-D E-M1

So I caved and bought the Olympus OM-D E-M1 as soon as it came out. My intentions were twofold: 1) I wanted a second body that was just as capable as the E-M5 so that I wouldn't have to switch lenses as often as I was; and 2) I was looking for something that would be better at handling moving subjects, and I figured that the dual phase/contrast detection autofocus system in the E-M1 would be the ticket.

To make a long story short: Holy crap, this camera is awesome!

Now, the slightly longer story...  I'm not going to repeat the specs or show you pics of the camera itself since there a gazillion other places where you can find that kind of information. Where I think I can provide value is in my own perspectives based on shooting with this camera for the better part of a month.

And yes, I've been doing a *lot* of shooting. I'm enrolled in a 10-month Professional Photography certificate program at my local college, and as such, I've been shooting almost every day for the past three months. I've already shot about 5500 frames on the E-M1 since I've gotten it.  Mind you, not all of those are "quality" shots since I've made extensive use of the high-speed burst and bracketing capabilities, but still, that's as many shots as I took in all of 2012, so I think that says something.  My basis for comparison is my previous main body, the Olympus OM-D E-M5, as well as older Micro Four Thirds cameras by Panasonic.  Please check out my earlier posts on the E-M5 for more information on how I use my camera, and tactics that I employ to deal with some of its shortcomings.

Without any further ado, here are my quick thoughts on this amazing new camera:
  • I didn't think it would be possible, but autofocus really *is* faster and more reliable than the E-M5, at least the way I use it. Unfortunately I haven't really put its continuous tracking capabilities to the test, but at least using it the way that I used the E-M5, I have a far higher hit rate for in-focus shots. I attribute this to the slightly faster subject acquisition, but probably more important - at least the way I use it - is that the AF zones can be made far smaller than on the older body. What this means is that you can put the AF point exactly where you want it, and thus reduce the risk of the camera focusing on the background.
  • In the theme of better focusing: focus peaking definitely helps speed up the process of manual focusing when you want fine, fine control over your focus point.
  • External controls!  Woo-hoo!  One of my major frustrations on the E-M5 was a lack of external controls for drive mode (in-camera HDR, exposure bracketing, high-speed burst, low speed burst, and self-timer). I use this function *all the time* and now it is possible to quickly change modes with a press of a button and a spin of a dial. Something else that I have found very handy is the toggle switch that allows you to access four different setting with only two dials. For example, I can very quickly change shutter speed and aperture or white balance and ISO just by hitting the mode switch and the two main control dials.
  • The intervalometer rules. It was a happy day when I discovered this function on the camera. Using it, I can set the camera to take as many frames as I want at pre-determined intervals. I took several self-portraits ("selfies?") as part of my school assignments, and the E-M1's capability to capture several frames without my intervention or an assistant is what made some of my finished photos even possible. I just wish that I could get sub-second intervals, but that's a minor point.
  • With the larger grip, the E-M1 is a much better platform than its smaller, older brother for shooting with larger lenses. Not that the Micro Four Thirds lenses get very big in the first place, but one of my mainstay lenses - the Panasonic 100-300 F4.0 - was sometimes a bit much to manage on the nearly-grip-less E-M5. Even with the added bulk, the E-M1 weighs less and is substantially more portable for activity-driven shooting situations than any comparable DSLR.
  • The WiFi is actually useful! I had never intended to use the WiFi function on this camera, but like the intervalometer, it was indispensable for self-portrait type shots. I could use my Android tablet to frame myself, set the focus, and take the shot. It was also handy in studio type shots when I didn't have an assistant: I could arrange my still life and see the results in real time without having to return to the camera's viewfinder. Having said that, I do wish that you could play with more than the basic settings when controlling the camera in this way, and that the live image was in high resolution so that you can see the fine detail of your compositions. As far as my research has shown, a true tethered shooting option does not exist for these otherwise highly-capable cameras.
Other than the fore-mentioned tethered shooting limitations, the other major annoyance is that the accessory port cover is small, fiddly, and *will* get lost. I lost mine within a week of getting the camera, thus compromising its weatherproofing. Again, this is important for how I use the camera, and may or may not be important for other people.

In a nutshell, with the E-M1 Olympus kept everything that was already great about the E-M5 and filled most of the holes that kept it from being my ultimate camera. 

Here are some of the images that came from this very capable little beast, each of which highlights some of its cool features:
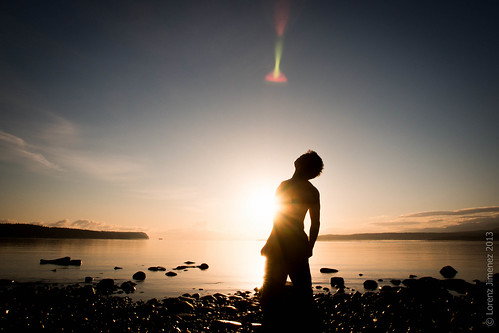
Awakening
Awakening
The above photo is a self-portrait. Using the intervalometer, I was able to move around in front of the camera to try different things while it automagically took several frames without my intervention.


A walk in the woods
A walk in the woods
This photo used the in-camera double-exposure function. Yes, I guess the function itself is a bit gimmicky and the same effect could likely be achieved in post-processing, but I like how it replicates how you would do double exposures in old film cameras.


Freedom
Freedom
This shot was taken using the Panasonic 100-300 F4 lens. The grip on the E-M1 is just the right size to improve stability and comfort while shooting with this, which is the largest lens I own.

I plan to use the E-M1 as my main camera body. The E-M5 still has a place in my camera bag though: it's slightly more pocketable, and when I bring both bodies along, I plan to put the longer, heavier lenses on the E-M1, and wider lenses on the E-M5, where focus accuracy is potentially not as critical.

Now, I'm just looking forward to trying the new Olympus Pro series F2.8 12-40mm lens. Anyone looking to get me a Christmas present? :)

Thursday, September 12, 2013

Olympus OM-D E-M5 long-term experience

Click here for my initial thoughts on the Olympus OM-D E-M5 Micro Four-thirds camera.

The review linked to above represents my thoughts on the camera (hereafter referred to as the "OM-D") shortly after getting it. A year later and having taken ~20,000 pictures with it, I think I've come to terms with what this little powerhouse of a camera can and cannot do.

A note about how I use the OM-D: I do primarily landscape and nature shots, sometimes hiking and sometimes mountain biking to the location. I don't mind heading out when the weather is less than ideal; sometimes such conditions lend themselves to more dramatic images. For these scenarios I find the smaller Micro Four Thirds form factor to be perfect, and the OM-D shines in these situations. Lately I've started doing some action sports photography, namely mountain biking and ultimate frisbee. Admittedly the OM-D is not the greatest tool for the job, but I have managed to make it work.  I almost never shoot video - maybe having taken a total of a dozen clips over the past year - so I can't really comment on the video functions.

Finally, other than the OM-D, I've only really used the Panasonic G1, GF2 and Sony DSC-H50 to any great extent, so I can't compare to other camera systems.

I don't feel like waxing poetic or being wordy just for the sake of filling space, so here are my random thoughts in bullet points in no particular order:

Things it's good at:

  • Autofocus with most lenses, especially the more recent ones by Panasonic and the Olympus kit lens, is wickedly fast. It's not horribly slow with the older Panasonic lenses like the first 14-45mm kit lens, the 45-200mm zoom, and the 45mm macro; there's a noticeable difference between these and the newer lenses, but for most purposes it's ok.
  • Dynamic range is far superior to the early Panasonic Micro Four Thirds cameras that I've used, namely the G1 and GF2. 
  • Burst mode at 9FPS is awesome! And you can repeatedly shoot multiple short bursts without choking the buffer.
  • It's nice to not have to worry *too much* when I take the camera out in a drizzle.
  • The OM-D handles poor lighting conditions pretty well with in-body image stabilization (IBIS) and a fast lens. I tend not to go over ISO 800, but by all accounts the files are pretty reasonable even if you go above that.
Areas where it falls short:
  • Continuous AF tracking is pretty poor, and that's being generous. 
  • The lack of a dedicated control for bracketing is very irritating. I've been in situations where I'm trying to bracket shots for an HDR landscape scene, and seen something that I want to shoot a series of un-bracketed shots. Digging through the menu to turn bracketing off in those cases has meant that I've missed several opportunities.
  • Not really an issue with the camera itself, but I've been disappointed with the lens it came with. The kit Olympus 12-50mm lens focuses quickly and has a very usable macro mode, but compared to my other lenses, it's horribly soft, especially in anything other than full bright daylight, and I'm always disappointed when I see the resulting images on my computer monitor. Despite the weather sealing and the fact it's my widest lens, I almost never use it now except when the sun is high in the sky. In situations where image quality matters, I'd rather use a plastic bag and use my other lenses with care in inclement weather, and do panoramic stitches in the case where I'm presented with a wide vista.
  • I still miss the full-articulated LCD from my Panasonic G1. The OM-D's flip LCD is fine for horizontal shots, but when used for low- or high-angle shots in a vertical orientation, it's no better than if it didn't flip at all.

Other observations:
  • The accessory port covers and rubber eyecup for the viewfinder are fiddly and small and easy to lose. I've lost them all, and now the weatherproofing is less effective and it's extremely uncomfortable to put the viewfinder up to my eye.
  • I still rarely use the touch-screen menu, preferring to use the physical controls wherever possible.
Tricks I've learned:
  • As I mentioned in my earlier post, I've configured the controls as much as possible to match those of the Panasonic G1. It's not perfect, but it reduced the learning curve for using this camera.
  • When I first started trying to take action photos, I kept missing focus since more often than not, the camera wanted to focus on the background. Changing to a single-point AF helps somewhat, but it still misses far too often for my liking. I've learned a number of strategies to deal with this: 
    1. For mountain biking, where the subject is typically moving towards me at a great speed, even the fast AF can't lock in time to get the subject in focus. One thing I do is pre-focus on the area that the cyclist will pass through, using some terrain feature like a tree or rock as reference. I then time it and hit the shutter just as the rider gets to my "zone". I still miss focus fairly often, but it's much better than the ~90% failure rate I experienced previously.
    2. For most of my best mountain biking shots, I positioned myself at a corner in the trail, where the cyclist changes direction from coming straight at me to traveling across my field of view, making focus speed less critical. This also has the added benefit of creating a more dynamic shot as the rider leans into the turn.
    3. In Ultimate, using a single point AF and focusing on the head or body of the player does help a bit. However, the smallest focus point is still larger than that of the Panasonic cameras, which still leads to occasionally focusing on the background. To deal with this, I lower the focus point and target the *feet* of the player. This way, the background (literally, the ground) and the subject are usually very, very close, and with the typical depth of field that is achieved, the whole player is in focus. 
In summary, I'm quite happy with my purchase, and I'd be interested in obtaining a second body so that I don't have to switch lenses in the heat of the action. I'm quite curious to try the Panasonic GH3, thinking that the larger body may match my largest lens (100-300mm Panasonic F4-5.6) a bit better, and the Panasonic GX7, with 1/8000s shutter speed and rotating EVF looks cool too. On the other hand, the recently-announced Olympus OM-D E-M1 sounds like it addresses many of the E-M5`s shortcomings as related to the way I use the camera.

Do you have an OM-D or other Micro Four Thirds camera? What are your thoughts?

Thursday, June 27, 2013

Olympus OM-D E-M5 Review

This short write-up is an expansion and update of my review on Amazon.com for this camera, written on August 5, 2012.


Initial Thoughts


Original Amazon.com review.

My Panasonic G1 was showing its age and I was growing frustrated with its poor low-light performance and slow autofocus, plus I wanted a second body so I wouldn't have to switch lenses so often. I cross-shopped this against the Panasonic G3 and GH2; I recognize that the G3 is much less expensive (I could've almost gotten two bodies for the price of this one body + lens), and the GH2 is more comparable price-wise. When I played around with the G3 in a store, I discovered that I just didn't like how it felt, and I really missed the automatic EVF proximity sensor. I never did get an opportunity to actually hold a GH2, although I imagine I would have liked it a lot. At the end, what tipped the scales for me were:

  • weatherproofing, since I take my camera on hikes, canoe trips, and mountain bike rides, sometimes under less-than-ideal conditions
  • in-body image stabilization
  • capability to add an external battery holder
  • reportedly greater dynamic range
  • weatherproof kit lens that goes wider than the Panasonic zooms (12mm-50mm)

After having used the OM-D for a few weeks, I can say that I'm happy with the purchase. The IBIS is the real deal, low light/high ISO performance has to be seen to be believed, and the autofocus is wicked fast. The capability and level of sophistication of this camera makes my old G1 look positively primitive. My only real complaint is that I wish the OM-D was a Panasonic, at least from a user interface perspective. I've spent two years shooting with one camera exclusively and I know how to get to all the controls and change all the settings that matter to me without thinking about it. Trying the Olympus for the first time, I knew the learning curve for this camera was going to be a steep one when I discovered that the Olympus zoom works opposite to the Panasonic zooms. I know that the UI on the OM-D is extremely configurable and I've done what I can to match the controls to what I'm used to, but I was only able to go so far. What I miss the most is the fact that the drive mode is not immediately available (on the G1 a lever quickly moves you from single exposure to burst to bracket to timer) and enabling exposure bracketing in particular is buried a couple of menu levels down. I also find it odd that not every button can be assigned to every function. Olympus has seen fit to limit which functions some buttons can take, and to make some buttons not customizable at all (D-pad up and left arrows, in particular). The touch screen menu is pretty comprehensive, but it still doesn't have the bracketing function, and because it's a capacitive screen and can't be operated while wearing gloves, I haven't gotten into the habit of using it. I also miss the fully-articulated LCD of the Panasonic cameras.

From an image quality and functionality point of view, the OM-D is exactly what I was looking for. Now all I have to do is get used to the UI...

Long-term Experience

Coming soon

Monday, December 3, 2012

Asheville, North Carolina

I've been meaning to come to Asheville for years given its reputation as a mountain biking destination. Now that I've actually been there,  Asheville, North Carolina, is officially my favourite American city. It's obvious that it's a city that embraces active and healthy living, it's got a vibrant downtown, people are very friendly, and the mountain biking is insanely good. About the last two: Never have I been anywhere before where on seeing my bike, random people come up to me in supermarket parking lots with unsolicited advice on which trails to ride. I got this advice in the hostel and at bike shops, but that was to be expected. In a parking lot while putting away my groceries? Not so much. It was greatly appreciated though, and I think it speaks to the character of this mountain town. Of course mountain biking isn't absolutely everything there is to this place: in the downtown area there are art galleries, ample selection of cafes and restaurants serving locally sourced yummies, numerous brewpubs, and more massage therapists and yoga instructors per capita than I've seen outside of Ottawa's Westboro neighbourhood.

Now about that biking...  I rode here for three days, and barely scratched the surface of what area surrounding Asheville has to offer.

On day 1, I rode the Laurel Mountain loop in Pisgah National Forest. If your thing is epic rides, this is the place for you. Once you get on a trail, it's miles and miles and miles before you have to look at your map. You don't have to think about which turn to take (they are few and far between) only about climbing over the next rise, cleaning the stream crossing, walking up the crazy steep slope, hike-a-biking over the jagged rocks on the off-camber turn with serious exposure, spinning the pedals as you go up, up, up.... Do you see a theme here?  I'll admit, I was not prepared for the relentless and seemingly endless uphill. I should've clued in when the guy at the bike shop started describing the route: "Well, you climb for six miles..." There's nothing to compare to this in New Jersey and I suffered appropriately. And the payoff? Going *down*. Bouncing over rocks, dropping off ledges, railing (or walking!) insanely tight switchbacks, and then rolling out to a sweet, flowing singletrack descent. Of course, the gorgeous vistas and the mystery of riding through tunnels of mountain laurel only add to the experience.

Day 2 was a vastly different ride. Needing an easy day I hit the much milder DuPont State Forest. I was frankly quite disappointed with these trails. With rolling hills and a mix of wide singletrack and fire roads, it seemed that this trail system is well-suited for someone looking to put in miles without the heart-attack-inducing steeps of the Pisgah National Forest. This day was redeemed by the wicked BMX track fun of the  Ridgeline Trail, and by views of several waterfalls.

Day 3 in the Asheville environs was spent taking a bit longer at the waterfalls in DuPont State Park, this time with the actual intent of taking pictures. No mountain biking this day, but instead I focused on exploring the possibilities of multiple-exposure shots like panoramas and HDR. Looks like I have a lot to learn here...
Triple Falls
Triple Falls upper sections - panorama

Triple Falls - middle falls
Triple Falls middle section - HDR

On Day 4 I finally got around to heading to Bent Creek, just 15 minutes from downtown Asheville. Man, to have a wicked trail system like this so close and readily available is awesome! Apparently all the locals think so too, since prior to riding here I was asked again and again if I'd been here yet. And, more to the point, it is obviously busy and well-used, and the parking lot at the trailhead was full of bike-rack-bearing vehicles shortly after noon on a Wednesday afternoon. Once I was out on the trails, I could see the reason for its popularity. Not technically challenging by any means, the trails are a cross-country rider's dream, all full of ups and downs and flow and general fun. Best of all, it featured a kick-ass, white-knuckle, whoopin' and hollerin', grin-inducing downhill, the likes of which I have not experienced since leaving BC. With jumps, bermed corners, and just enough obstacles to keep things interesting, I had a great old time going down this rollercoaster of a trail. (Note: I'd *love* to take a 1st person video coming down this thing. If someone wants to get me a GoPro Hero 3 or Contour 2+ or something along those lines for Christmas, I'd be a very happy camper!)

As I said earlier, I just barely scratched the surface of what Asheville has to offer. Will I be back? Oh yes!
Bent Creek parking lot shortly after noon on a Wednesday in late November

Monday, November 19, 2012

White Clay Creek State Park - Check!

As I mentioned in my previous post, I'd been meaning to check out White Clay Creek State Park in Delaware. Well, I finally made it. What a blast! The trails are fun, fast, and flowy, and there's even a few surprises. With very little in the way of obstacles and elevation change, this would be an ideal park to ride a singlespeed cross-country rocket. No derailleurs, no slapping chain, no shock squishiness... Sadly, today I had to make do with my Blur LT, a somewhat long-legged trail bike that was serious overkill for the terrain, and on my first trip up, I was on my crippled Giant Anthem with its rear shock so far gone the bottom bracket was practically scraping the ground. Yes, that's right, I've been there twice, two Sundays in a row. Despite the drive (it's about a two hour trip one way), I was entertained enough the first time around that I immediately made plans for a return. I'm so glad I did! On my first go-around I missed the southern portion of the trail system, so that's where I dove right in today.

Straight out of the parking lot is  a long, flowy (you're gonna hear that word a lot), nearly pedal-free, singletrack decent. Wheee! Then a bit of a climb, then a whole series of log piles, like someone had left their firewood to season in the middle of the trail. Fun! Then a decision, left down Snow Goose, or right on Mountain Goat. Mountain Goat looks like it's a little less-traveled, might be interesting. Rounding a corner I realize that the trail is aptly named as it hugs an almost-sheer drop around the bend. The exposure is not anywhere near as bad or consequential as in Colorado or around Moab, but you definitely notice it. Dropping (litterally - the trail is near-vertical) down into a ditch and soaring up the other side brings me to another decision point. This time the trail called "Corkscrew" beckons me forward. I figured with a name like that it's got to have the goods, and yup, it delivers them in a whoop-de-do-filled package. Down, up, turn, down, up, turn, lather, rinse, repeat... Like a half-pipe for cross-country bikes, going weightless at the apex of each turn. Wheeee!!!! (If you've ever ridden the Sidewinder or Tap-and-Die trails in Vermont's Kingdom Trails, or the bottom of the Mount 7 trail in Golden, BC, you'll know what I'm talking about.) Well, *that* was unexpected. More flowing singletrack goodness brings me back to the car, where, after a bite and putting on another layer (it's getting cold!) I'm off to explore new trails, but return to Mountain Goat and Corkscrew to finish off the day on a high.

The trails in this area are extremely well-built and -maintained, and traverse scenic valleys and fields, and offer lots of views of beautiful bubbling brooks. It could very well be that autumn brings out the best out of these trails, but more than a few times I stopped to just soak in the scenery. Or maybe 6 weeks of minimal riding took its toll on my cardio and I just needed extra breaks.  ;)

Unfortunately I have no pics of this adventure. I brought my camera on my 1st trip and carried it for several miles in my backpack. I saw an opportunity, took it out for a quick snap... "No Card" blinking on the LCD. Crap. On my second ride I made a conscious decision not to bring the camera. I just wanted to ride! You're just gonna have to use your imagination for this one.

Sunday, July 8, 2012

Updated Trails List

I've just finished a four-day run of mountain biking. That's more riding than I've done in a long, long, time, and I can't even remember the last time I did that many days in a row. Mind you, day three almost doesn't count: daytime temperature in Huntingdon, Pennsylvania was 41 degrees Celsius, so after an hour of riding, I just said, "screw this!" and went to the bar. Much cooler there, what with the air conditioning and a pint of wheat beer.

Today's ride on a new-to-me set of trails in the Western side of Allamuchy Mountain State Park in Northern New Jersey, which was on top of rides around Raystown Lake and Rothrock State Forest in Pennsylvania, got me to thinking about where I've been on my bike. Just out of curiosity I tried to remember all the places I've gone mountain biking and put them down on my trails list. I actually surprised myself with the length of the list! Despite all I've ridden, I've definitely got more on my to-do list: White Clay Creek, Delaware; Bend, Oregon; Crested Butte, Colorado...

Sunday, January 8, 2012

Clik Elite Compact Backpack Review

I reviewed the Clik Elite CE706GR Compact Backpack on Amazon.ca. Here's the review, edited slightly.

I desperately needed a daypack that could hold a hydration pack and yet would leave my camera with lenses readily accessible. The Click Elite Backpacks seemed to fit the bill: rugged camera backpacks with a sleeve sized to fit a 3L hydration bladder. I have a smaller camera system (Panasonic G1, lenses: 14-45mm, 45-200mm, 45mm prime) and prefer to travel light so I thought that the smaller backpack would work well

Pros:
- comfortable, carries the weight of a camera, 2L of water, snacks, and a small tripod well
- seems bombproof, except for the pulls and toggles for the elastic straps
- appears to have space for a camera body with lens and two spare lenses

Cons:
- it's possible to fit a 3L Camelbak bladder with up to 2L of water, but when it's full with 3L of water it's a pain to get it into the sleeve
- it's not *practically* possible to fit my camera with a lens mounted, plus my two extra lenses in the camera compartment. With two lenses in the lens holders, there's no room for the mounted lens when I insert my camera body. I now have to choose which glass to bring with me on my hikes, and I've cursed a couple of times when I had a perfect shot for the lens that I didn't have with me.
- the camera compartment zippers get stuck when opening and closing the compartment. It seems like the turn radius at the corners of the compartment is too tight for this size of zipper
- external pocket & elastic strap not practical - would've been more useful with a larger-volume pouch. The pull for the elastic strap came off when I tried to "encourage" it to hold a light jacket in place.

Field notes:
I went hiking near Port Hardy, BC, on a very rainy day. Found out to my dismay that the rain cover couldn't accommodate my tripod, which was in the tripod holder. I also found out that the cover wouldn't stay put - it would become dislodged at the slightest provocation. I really wanted to like this pack since it got rave reviews in other places, but it's barely functional for me. I'll keep it until I can find a suitable replacement but there doesn't seem to be much else out there...

2/5 stars.

Sunday, November 6, 2011

Perseverance pays off!

On October 30, I volunteered my time at the Perseverance Trail Run, an annual trail running race held in Cumberland, BC. The day before Halloween, all the racers showed up ready to Trick or Treat in the woods! Well, actually, all the sweets to be had on race day were to be found at the finish line, where a box of donuts went to the best costume of the day.

Babes in the woods
My job was to man Checkpoint 6, just a bit more than halfway in to the 10.5 km course, where racers would come charging down the Bear Buns trail before making a hard right across Sykes Bridge, and then continuing on to Off Broadway. The action was fast and furious and the terrain treacherous. Many's the racer that was so intent on his or her footing that they barely noticed me pointing and yelling, "Turn right!" as they came close to overshooting the turnoff. But even if they safely made the turn, they weren't out of the woods yet, so to speak. Sykes Bridge is a narrow wooden bridge that is very bouncy at the best of times, and on race day was slick with the morning's rain. Woe to the racer that didn't heed my warning to "Walk on the bridge!"

Racer after racer passed my checkpoint - about 150 of them, many decked out in their Halloween best. Some of these guys were pretty quick, but probably the most impressive performance was that of the last pair that came through before the "Grim Sweeper" - an elderly couple, the man leading his visually-impared wife through the woods with words of encouragement.

Back at the finish line everybody celebrated their success with burgers and hot dogs, medal presentations, and draws for some cool swag.

The Last Unicorn?

Many thanks and congratulations to Sarah Seads of Equilibrium Lifestyle Fitness (ELM) and the other organizers for running such an incredible event!
The "Grim Sweeper"


Friday, October 28, 2011

Gettin' Crafty on the Butcher

Crafty Butcher double teeter-totter
So apparently there's some mountain biking to be had in Cumberland, BC. So says the map that shows the piled-spaghetti heap of trails just outside of town. So says the mud-splattered hordes of dudes and dudettes wheeling down the main drag on knobby-tired bikes of all description. So says the groups we've recently had here at the hostel, one of which traveled from Whistler to ride here, and another of which included a couple of national champions and the rep for one of the largest Canadian bike manufacturers. So says the organizers of the BC Bike Race, the 7-day-long epic torture test for masochists. So yeah, I suppose there's some mountain biking in the area.
Jessie demonstrating the angle on the wooden berm

"Most Trails are Advanced." That's the beginning of the Cumberland entry in the Mountain Bike Vancouver Island guide book, and let me tell you, they're not kidding! If you learn to ride here, you get really good, really fast. Rocks and roots and ridiculous steeps are prominent features of just about all the trails in the area. Oh, and what about the woodwork? There's a strong community of trail builders in the area who have put an enormous amount of work into building and maintaining all the singletrack, and many of the trails showcase their creativity and skills with a chainsaw. For example, "Thirsty Beaver" is a newer trail with oodles of bridges and ramps and skinnies, most of which go a long ways to keeping the trail sustainable through all the crazy and wet terrain that it traverses. And yes, there's the "Crafty Butcher", a trail with a double teeter-totter in the middle of it - just because. Why the heck not?!?
Railing the corner on the Crafty Butcher

And just in case you get tired of what Cumberland has to offer, all of the communities in this area are host to mountain biking trails of various degrees of epic-ness. Courtenay's Forbidden Plateau is apparently festooned with downhill-friendly trails. I haven't ridden there yet, and my intel is based on the trail maps and oh-so-handy guide book, but it's on my list. Again, "Most Trails are Advanced." Campbell River's Snowden Forest (which I have ridden, "Most Trails are Advanced") is swoopy, flowy, just-keep-pedaling double- and single-track. Just watch out for the arrows labeled "50 km." I started following them for lack of any other plan, and while I can't attest to the actual distance of the route, I can tell you that it keeps on going, and going, and going... And there's Quadra Island ("Most Trails are Intermediate"), where apparently "the fastest man in the world" and owner/operator of Naked Bicycles can be found leading group rides.
Old canoe
Derelict canoe on the shore of Morte Lake, Quadra Island
I haven't even come close to exploring all the trails in this area, but believe me, I'm gonna try!


Friday, October 7, 2011

Iceline - Celeste Lake - Yoho Valley loop

Iceline CairnJust getting caught up on posting some of my adventures from this summer...

In August I spent a few weeks in the Canadian Rockies, and if there's any place in the world that has more spectacular and varied hikes than here, I challenge you to tell me about it.

I started the Iceline hike a bit later in the day than I'd intended. I had planned to hit the trail in the afternoon, with the hopes of catching Takkakaw Falls with the late-day light that's more favorable for photography, but I got delayed by some unexpectedly nice views at Moraine Lake in Banff National Park, so it wasn't until after sunset that I returned to the Falls. But I'm getting ahead of myself...

The Iceline Trail starts and ends at the Takkakaw Falls. They were spectacular, but I didn't take any pics as I set out on my hike. "Later," I told myself, since my folks had already taken many of those shots. So across to the Whiskey Jack Hostel, and up the trail I went. Steep at first, the trail switchbacked up and up and up... And the view of Takkakaw Falls kept on improving. And suddenly, I was clear of the trees.
Takakkaw from up high
Takakkaw Falls from up high
The Iceline trail is justifiably popular and well-traveled, although due to my late start I saw only a few people, all going the other way. (Hmmm... Did they know something I didn't?) The views of the surrounding mountain ranges and valleys - and yes, the Falls - were magnificent. Unfortunately, as I reached the high point of the trail I looked up to see ominous clouds spilling over the mountain's peak, and I was encouraged to find the quickest way down. The "quickest way" - and I mean quick, as I was chased by the darkening sky and the splatter of fat raindrops on the rocks - essentially meant running down the trail to Lake Celeste, and the subsequent trek along the Yoho Valley back to my car. As luck would have it, the thunderstorm never did more than threaten, and the rain had subsided to a light, steady drizzle once I was off the exposed slopes. Traveling at a more relaxed pace, the Celeste Lake trail was quite pleasant with lush sub-alpine meadows and forests everywhere. At one point near the peak of the Iceline trail I had looked down on a meadow and thought to myself, "I hope the trail goes down there"; and lo and behold, forty-five minutes later I was striding through that very same verdant meadow, crossing merrily babbling brooks, under the stern eye of an unidentified raptor. It was magical, but since I had packed my camera to keep it out of the rain, I've got no pictures to share. Ah well, that's one sight that's for me alone!
Life on the edge
Life on the edge
The trail became substantially easier as I descended, and by the time I had reached Laughing Falls and turned on to the Yoho Valley Trail, it was flat, wide - and quite frankly - boring. Ah well, at least the lack of challenge allowed me to make good time on it, which is just as well. Remember the late start that I had alluded to at the beginning of this post? Well, despite the speed I was able to maintain on this final part of the trek, I missed the evening light on Takakkaw Falls, and only caught the last of the sun's rays as they crept up the cliff face.
Takakkaw by the last light of the sun
Sun's last light falling on Takakkaw Falls
I suppose there's always next year; after all, this is a trail that I wouldn't hesitate to hike again.

Thursday, October 6, 2011

Pressing "pause" on life's movie


Riding Fool sign
So I've been more-or-less on the road for almost six months now. To me that seems like quite a lot - especially for a self-avowed non-traveler. My pace has definitely slowed considerably since I left Ottawa back in April. I haven't really had a strong urge to move on and explore in the past several weeks; recent forays to Tofino and the Juan de Fuca Strait were done with company, which certainly kept the enthusiasm up. Admittedly some of the lethargy is due to a nagging (but healing!) injury that I received during some ill-advised antics in Golden, BC, but mostly I think I've seen all the scenery I can handle and just need to sit an process everything for a bit, as well as give myself an opportunity to figure out what to do next.

Riding Fool interior

The old Tarbell's Store
So where am I? To date I've spent over a week in Cumberland, BC, a small former coal mining town in Vancouver Island's Comox Valley. It's a cute little town with a very strong sense of history and many heritage buildings lining its main street. There's rivers and creeks and trails and mountains nearby, and the ocean is a short 15-minute drive away. Mountain biking is supposedly epic, and from the trails I've been able to walk it seems that the reputation is well-deserved. I've been staying at The Riding Fool Hostel, which is on the second floor of the old Tarbell's hardware store, the remainder of which now houses a bike shop and cafe. This is a nice hostel, with a fantastic common area, well-laid-out kitchen, and comfortable beds. The folks who run the place are awesome and I can get discounts for weekly stays. What's not to like about this place? :)

I figure I'll kick around here for a while, maybe find a place to live and work and return to "real life". In the meantime, I'll get caught up on some blogging since there's a bunch of hikes I did in the Rockies for which I've got notes and pics, but never got around to posting. Keep your eye on this space!


Perseverance Creek
Perseverance Creek

Saturday, September 17, 2011

Powell Forest Canoe Route

I spent four days in September 2011 on a solo paddle of the Powell Forest Canoe Route.

I'll come out and say it right away: It was just ok. I guess I had been expecting more of a wilderness experience, but there was no escaping that the Powell Forest is a working forest, with active logging happening during the weekdays. The construction-zone-like noise and swaths of clearcuts drove me from some otherwise charming campsites. Other than the visible industry, the only other complaint I had about the route itself is that I wish that it had involved some river paddling. I much prefer gliding down a meandering river to paddling an open lake, but that's just my preference.

Other than the mismatch between my expectations and the reality of the area, the Powell Forest Canoe Route was quite pleasant. The lakes were clear and quite warm and would've been perfect for swimming, if only the weather had been more cooperative. There were tons of fish too, and this trip would definitely be of interest to those who are keen on a fishing expedition. (Aside: it took me three days to figure out how to catch a couple of cutthroat trout - I've only really fished in Ontario for walleye, pike, and bass, and have no clue about what makes Western species tick. I did manage to have a decent shore dinner on the 3rd day though.) The portages are straightforward, if occasionally a bit long, and bridges are thoughtfully built over and around wet areas and streams. In fact, the portages would be nice walks unto themselves, if you could ignore or somehow do away with the boats and gear you're lugging as you traverse them. The campsites are typically situated at the portage terminations, and in the case of a couple of the longer ones, at the halfway point. To that end, they're apparently sited more for utility than for view or surroundings, but the one at the southernmost end of Horseshoe Lake is quite nice.

As for my trip, I've already alluded to its most dominant feature: cloud cover and rain. For the weeks leading up to my departure, Powell River and the rest of BC's Sunshine Coast had been awash with sun. And the day I was dropped off at my starting point by the lovely lady who runs Mitchell's Canoe and Kayak Rental promised more of the same. I overnighted at Wilson Lake, and awoke the next morning to heavy cloud cover. Well, at least it didn't rain that day...

View from Wilson Lake campsite
One thing I hadn't really accounted for was that the shortening days left less time for travel than I was accustomed to, and had to adjust to making camp by 5:00 in the afternoon in order to not trip over my tent's guylines or fiddle with my stove in the dark. Just as well, I had allowed myself 4 days to do what would normally be a 3 day trip for me. The extra time came in handy since I started paddling late - at noon - on the last three days, which is about when the rain let up. Even so, I came in under the wire, arriving on the afternoon of the last day at my take-out point at Lois Lake with minutes to spare before my outfitter started charging extra for waiting.

Water plant
These little pink flowers were all over the shoreline at Lois Lake

Sunday, August 28, 2011

Golden, BC: Mountain biking destination!

I've spent the past two days mountain biking in Golden, British Columbia.

I'd heard about the mountain bike trails here in Golden from a guy who was fishing on "my" pond while I was kamping in the Kootenays. He noticed that I had a "cross-country" mountain bike, and suggested I give the Moonraker system of trails a try. (Brief aside: I think it's funny how my bike, a Santa Cruz Blur LT2, is immediately identified as an XC bike out here. In my "home" trails in New Jersey/New York, it's often mistaken for a downhill bike. Just goes to show what the standard is west of the Rockies.) So after leaving Canmore - not a bad place for XC riding itself - I wandered over to Golden with the explicit intention of riding Moonraker. I eventually got to those trails, but in a bit of a roundabout way.

My first ride in Golden turned out to be a full day of downhilling at the Kicking Horse Mountain Resort. I hadn't actually intended to ride there - I was actually there to see if I could ride the gondola up to take sunset pictures from the mountain top. Well, one thing led to another, and I found myself encased in a full-face helmet, dressed in body armor, waiting in the chairlift line with another guy and our guide/instructor. Oh yeah, the instructor: never having done any lift-accessed riding before, I thought it prudent to have someone along who knew what he was doing, so I tagged along with this guy from Calgary who had signed up for a full day of guided riding at the Resort. Tom, our guide, quickly assessed our skill level, and after our first run on intermediate trails, it was nothing but black diamond runs for the rest of the day. Oh yeah, did I mention I'd never done downhill before? Turns out that a decade of regular riding in locations like Ottawa, New Jersey, and New York, combined with a couple of years of racing early in my career counts for something! I learned a lot in those hours and before too long I was flowing (as opposed to bouncing pinball-like!) down the trails. Alas, something I ate at lunch didn't agree with me, and towards the end of the day my stomach was churning, my concentration was shot, and despite the experience of several clean runs, on my last trip down the mountain I ended up falling more than I had in the past two years of riding. All the padding I was wearing certainly did its job! All I ended up with was a bruised knee.

Day two started with a bonus - an unanticipated shuttle up Mount 7. This guy in the hostel had nothing to do until his afternoon rafting trip, so he offered to drive me to the top of the mountain that had formerly hosted the Psychosis downhill race, also a launch point for para- and hangliders. I put my newly earned downhill skills to good use and railled all the intermediate runs to the bottom of the mountain. Note that I stayed off the black diamond runs this time: as mentioned above, unlike what some East Coast riders may think, my own personal bike is *not* a downhill bike! The bottom half of the mountain was especially fun and flowy, culminating in a sweet half-pipe. And that was just the start of the day...

I *finally* made it to the Moonraker trails - my reason for being in Golden at all - in the afternoon. Long story short: WOW! All kinds of flowy, fun, singletrack goodness threading through pine forest. The CBT Mainline trail, which actually connects the trail system to the town of Golden, is especially not to be missed.

There may be another Golden mountain biking day in my future...

Update Sept 6, 2011:
I did manage to do another day of mountain biking in Golden. I'd headed up the CBT Mainline trail for another XC ride in the Moonraker trails, but at the top of CBT I decided to turn around since my knee had started giving me problems from all the crashing I'd done on my first downhill experience. On my way back to the Dreamcatcher, I rode by this cute downhiller girl I'd spoken to a few times on the trails; she was loading a bunch of bikes into her pickup truck. "Wanna go for a ride?" she asked. "Sure!" I replied. (Really, what else could I say?)  She and her friends took me to a little-used downhill trail that only locals go to. Let's just say that while I'm a pretty good descender for an East Coast XC rider, I got nothin' on real honest-to-goodness Rocky Mountain downhillers.
The aftermath

Friday, August 26, 2011

Will and Kate had tea at Skoki Lodge...

Skoki Lodge. A very lovely lodge that we neither stayed nor ate at.
...But we didn't! At $5 per person for tea (albeit unlimited amounts, but how much tea can one drink anyways?), it seemed a bit steep (pun intended - sorry!). Rice Krispy squares at $5 also was a bit much, so at the end of the day all we sampled at the Skoki Lodge was the atmosphere and filtered water. Ok, I'll fess up: a very nice lady - one of the legitimate lodge guests - donated her share of the squares to our cause so we didn't walk away entirely empty-handed.
A very notable pair of signatures

Saturday, August 20, 2011

"Beauty Creek" is Aptly Named

P1080990.jpg
The old Banff-Jasper highway
The walk wasn't so promising to begin with; maybe the flat, straight crumbling remnant pavement of the old Banff-Jasper Parkway route deters would-be sightseers form continuing further. Or maybe it's because there's only a little tiny symbol of a hiker at the trailhead that indicates that there's anything interesting beyond. Either way, people on this trail were few and far between, which I see as a good thing. Once you're on the trail proper, you're off the old asphalt and it becomes a bit more rugged, more rooty, more interesting - but is still very easy as far as walks in the Rockies go. Regardless of the inauspicious start, taking the next few steps along this trail was very worthwhile. In seemingly no time at all, the first falls appeared.
Beauty Creek Waterfall
First set of waterfalls at Beauty Creek

Then the next, and the next, and the next - all in quick succession. Apparently there's five in all, but I didn't count. Stopping at each set to take pictures, usually from multiple angles, time just flew by, and despite the short length of my walk (1.6 km distance, 200m in altitude gained), two hours had gone by. I actually could have gone further but I hadn't prepared to do so and my stomach was reminding me that it was dinner time.

Beauty Creek Waterfall
A waterfall at Beauty Creek

Hard-core hikers will be less than impressed with this walk. "Where is the elevation? Where are the epic views?" they will ask. But that's ok. As Kathy and Craig Copeland hinted at in their wonderful book, Don't Waste Your Time in the Canadian Rockies, this is a walk for the small wonders: "And hikers, after being overawed by grand mountains, are charmed by the human-scale beauty of this intimate chasm." And wonders there are indeed. I found this walk every bit as scenic as - and with the solitude, far more enchanting than - the crowded, sanitized, Disney-fied Johnston Canyon walk. At Beauty Creek, you can get right down to the water, scramble across rock slabs, and even perch precariously above cascades.

Beauty Creek Waterfall
Beauty Creek waterfall from above

One thing that I don't understand is how kayakers could possibly manage this creek! According to the second edition of the Canadian Rockies Backroads Mapbook, Beauty Creek is one of the paddling opportunities in the Rockies:
Beauty Creek exists for one reason: to show off, preferably in front of a camera. If you are looking for an exhilarating ride down a wild white river, there are other places wilder and whiter. If you are looking for a great picture of you dropping off a 12 metrre high waterfall... well, here's your chance.
That I would like to see!

Beauty Creek Waterfall
A Beauty Creek waterfall
Definitely a worthwhile stop, and even a potential for repeated visits to witness the changing light and seasons. But only if you appreciate waterfalls...

Friday, August 19, 2011

Overnight Backpack on Mill Brook Ridge, Catskills

Mists
Misty Alder Lake
Note: This hike was actually done in August 2010 but for some reason I didn't hit "Publish Post" on this entry.

I went on an impromptu overnight backpacking trip in the Catskills. My intention was to hike from Alder Lake, along the Mill Brook Ridge to the Balsam Lake Mountain trailhead, and continue along the Neversink-Hardenburgh Trail to spend the night at a campsite just past Vly Pond. Essentially, completing the Mill Brook Ridge and part of the Fall Brook sections of the Finger Lakes Trail. You know the saying, "No battle plan ever survives contact with the enemy"? Well, none of my plans survive contact with... well... me.

Spent Friday night at a campsite at Alder Lake. Experimented a bit with taking nighttime shots with my new camera, and then just lay down on a picnic table to catch the tail end of the Perseid meteor shower.

Saturday dawned bright and clear, and after a quick breakfast I hit the trail. Given my previous Catskills hiking experience, I made sure that I was carrying enough water to last me the two days. My backpack (Gregory Z55) wasn't really designed to take this kind of weight and the way it was distributed (5L in bladders in the pouch inside the pack, another 2L in bottles in the exterior pouch) so it wasn't long before it - and my shoulders - started complaining. Off to a great start...

This trail doesn't seem to get a lot of use and the ferns and other plants grow quite close to the path, so for much of the time there wasn't enough room to place my hiking poles. I do like this kind of terrain though, and the greenness is very refreshing. With the many streams along the way, it's quickly becoming obvious that I needn't have worried about the water situation. Just as well, since my hydration pack bladder sprang a leak and emptied itself overnight.

Refreshment 2
Directions to the spring
The two scenic lookouts (at Mill Brook Ridge and at the Balsam Lake Mountain Fire Tower) revealed nice enough views, but nothing really to write home about.

By the time I got to the Balsam Lake Mountain Fire Tower, my chronic plantar fasciitis was acting up in a big way. Rather than continuing on to the Neversink-Hardenburgh Trail, I decided to make camp at the Balsam Lake lean-to, thinking that I was better off knowing I could make my way back, rather than suffering through an extra 10 miles of up- and downhill hiking. Turned out to be the right decision.
Mountain mists
Catskill Mists

Sunday, August 14, 2011

Conrad Kain Trail impressions

Bugaboo Glacier
Bugaboo Glacier
I'll preface this post with a caveat: I hesitate to call this a trail review since I didn't really capture any hard data on it (mileage, trail conditions, time to complete, etc.); this post merely reflects my impressions and experience of it.

And here's another caveat: I hadn't actually intended to do this trail. I actually wanted to go up the nearby Cobalt Lake trail, but by the time I got my act together, the day was half done, and I wasn't sure I could safely complete the slightly longer and steeper route to and from Cobalt Lake before nightfall. 

At the trailhead, I was sure to secure my vehicle against the predations of the local porcupine population.

The route to the Conrad Kain hut in British Columbia's Porcupine Provincial Park is quite heavily traveled by mountaineers, rock climbers, and all kinds of adventurous folk who want to test themselves against the Bugaboo Mountain Range. The lower section of the trail is very well groomed, quite mild, and offers no indication of the challenge to come. The lower trail meanders happily along amidst forests and streams and then gradually - so gradually that you barely notice it - goes *up*. Passing a waterfall you suddenly notice that you're breathing a bit harder. Then you leave the trees behind and the altitude you've gained is revealed. Tenacious wildflowers cling to the mountainside rubble. Then come the rock piles and the steepness, each step harder than the last. And next, the cliff where your only security is the narrow path beneath your feet and the chain tethered helpfully to the sheer rock face.
A treacherous path
A Treacherous Path
(Note that my impression of this part of the trail is coloured somewhat by a mild case of acrophobia and a two-month layoff from any strenuous physical activity resulting from a strained lower back. Those without the aforementioned conditions who are in reasonably good shape and sure-footed should suffer no ill effects from the trek.)

Very close-up of some kind of white mountain flower
Western Anemone
Once you're free of the trees and the steep ups you see the glaciers, the view into the distant valley, the streams, and the cascades created by the meltwater from the aforementioned glaciers. And still the trail climbs on...
Glacial meltwater
Glacial Meltwater

Arriving at the Conrad Kain Hut comes with a mild sense of relief, and yet is anti-climactic. You have a view of the Bugaboo Glacier, and the valley below through which the Bugaboo Creek runs, as well as the various peaks of the Bugaboo Range, but somehow I'd expected something more. I can only surmise that the "more" comes from the mountaineering and rock climbing for which this hut is a mere launching point. As attested to by the number of vehicles at the trailhead parking lot, there were indeed many parties staying at the hut or passing by, with the intention of summiting the surrounding peaks or traversing the glaciers or staying at one of the two nearby campsites. Not being one of those intrepid souls myself, and in any case lacking a party to adventure with, I set my boots on the trail back down. For me, this was challenge enough. My right knee doesn't actually work properly anymore due to an injury acquired a couple of years ago playing Ultimate Frisbee, so descending for me is actually as difficult as the trip up. On the way down I was passed by several mountaineers burdened with two or three times the load that I was carrying. No big deal, I wasn't in a hurry anyways.
Conrad Kain Hut
Conrad Kain Hut

At the end of the day, I'd sum up the hike to the Conrad Kain Hut thus: It's a great workout, and if you've got a hankering to experience mountains and glaciers away from the crowds that plague the nearby National Parks of the Canadian Rockies, this is a worthwhile trip. Otherwise, it's a fantastic launching point (pretty much the only launching point) for expeditions deeper into the Bugaboo Mountains.

Friday, August 12, 2011

Gregory Z55 Backpack Review

This is a review of the 2008 Gregory Z55 backpack.

I've had this backpack for almost two years now, and have had an opportunity to put it through its paces. What follows below is largely a review I posted on the Mountain Equipment Co-Op (MEC) product page, with a couple of updates.

I bought this pack after using its bigger brother, the Baltoro, for a year. I've taken the Z55 on several long day hikes and a couple of overnight backpacking excursions, and it works quite well for these kinds of trips, even though it's a bit of overkill for day trips. The suspension system is well-thought-out and I found that it's very comfortable to carry as long as the bag is not overloaded. I've generally enjoyed Gregory's suspension system on my two large backpacks and found that it works the best for me in terms of fit, comfort, and adjustability of all the designs I've tried from a few manufacturers (Osprey, MEC, Arc'teryx, Black Diamond). Of course, fit is a personal thing, and obviously your mileage may vary.
The belt pockets are very handy, and the plethora of compression straps means that I can stabilize the load when the bag is less than completely full. One thing that could be improved is access to water. If I'm in an area where fresh water is available, I'd prefer to use water bottles to make it easy to refill/purify as I go, rather than using a hydration bladder which requires the removal of the pack contents to refill it. Unfortunately there's no exterior water bottle holder that's accessible when wearing the pack, so I have to remove it to take a drink. Three other things to note: first, the fabric is very thin, so you have to be careful about packing things with hard edges. After just a few excursions, the bag developed holes in a couple of places where hard objects (e.g. plastic trowel) have poked through. I guess this is the price you pay for light weight. Second, the bag is definitely not waterproof, but this isn't an issue for me since I pack all essentials in waterproof stuffsacks. Third, while my back length requires a medium size pack, with a ~30" waist, I'm at the very edge of adjustability for the hip belt - I can't tighten it much further.

Pros: Lightweight, Good Value, excellent suspension system, hip belt pockets
Cons: poor water bottle access, needs to be packed carefully to avoid hard objects against the pack fabric
Overall Rating: 4/5

I'll update this post again with pictures when I have a chance.

Wednesday, August 10, 2011

Kootenay Kamping

Bugaboo-Septet Rec Site View

British Columbia has all kinds of awesome little camping spots that are usually free or very cheap. I managed to stay at a couple of them in the Kootenays - Botts Lake Recreation Site and Bugaboo-Septet Recreation Site - for a few days. It was quite nice to be able to just chill for a bit next to my own private lake and river in these tranquil spots away from the madness and mayhem of my recent adventure race volunteering experience.

Evening flowers
Evening Flowers at Botts Lake

One of the funny things about the region in and around Bugaboo Provincial Park is that the local porcupines have developed a taste for rubber, especially of the automotive variety. You have to be very careful to protect your car from the depredations of these rascally rodents - protection involving chicken wire, lumber, and rocks. As much as a pain as it is to set up the protective barrier, failing to do so (or do so well) can leave you stranded or lead to an accident. The porcupines in this area have been known to chew tires, electrical wires, brake hoses, and - as one Westfalia driver was cursing as I left the Conrad Kain parking lot - fuel lines.
Anti-Porcupine Device

Anti-Porcupine Device in Action

Bulk Porcupine Deterrent

Monday, August 1, 2011

More BC Wandering

Raid the North Extreme is over and done with, having finished a couple of days ago in Trail, BC. I actually completed my volunteer stint a couple of days earlier and didn't stick around to see how it turned out. Hopefully I'll get a chance to post a bit more about the experience in the near future, but to sum it up in a few words: wet, cold, sauna, sleep deprivation, work.
At the start line
Race start
I spent the past couple of nights in an awesome little (free!) campsite by a lake near Radium Hot Springs in BC, and now I'm off to see if I can get into the Bugaboos. Might also do an overnight paddle down the Columbia River if I can find a suitable outfitter. Should have enough to do before I meet my folks at the end of the week in Banff...
Benchland Lake Reflections
View from My Campsite - Botts Lake Reflection